I. Understanding the Map Editor
First things first; the commands of your house are:
/edithouse - This command opens up the map editor. (only in your home)

/leavehouse - The command that allows you to leave any PMU house.

Now you know the basic functions to get started, but it is important to understand each part of the map editor to map to your full extent!
A. Where things are and what they do
a. Terrain ![]()
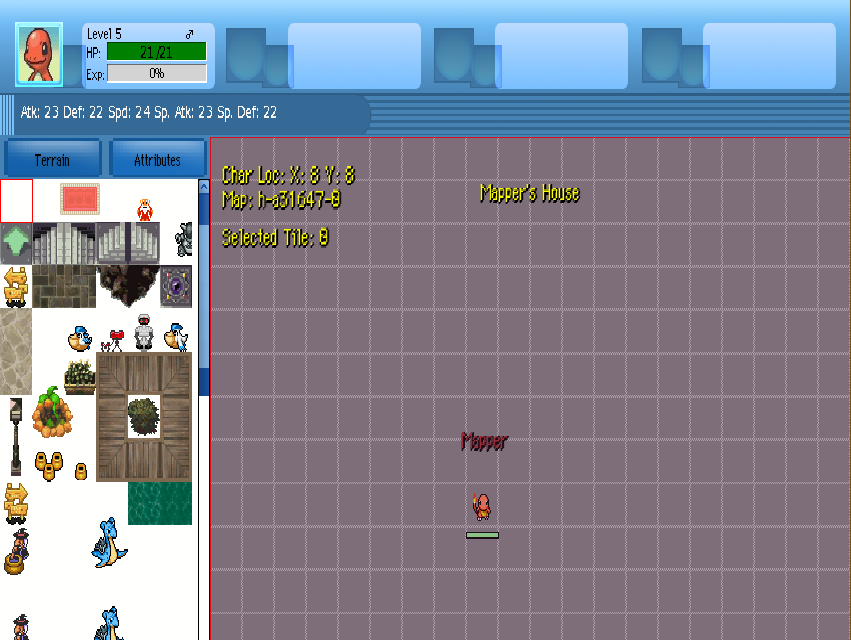
The area on the left is the terrain portion of the map editor. Terrain refers to any mapping tiles you may be placing. To begin mapping, click the tile on the left you want to use, then click a tile on your map to place it there.
Tip: By holding your mouse and dragging it across your map, it can place that tile wherever you take your mouse. This allows for quicker additions.
There are 11 different tilesets to choose from; each tileset holds different types of tiles. (Such as Dungeon, Indoor, Overworld, Background, etc.)
b. Attributes ![]()
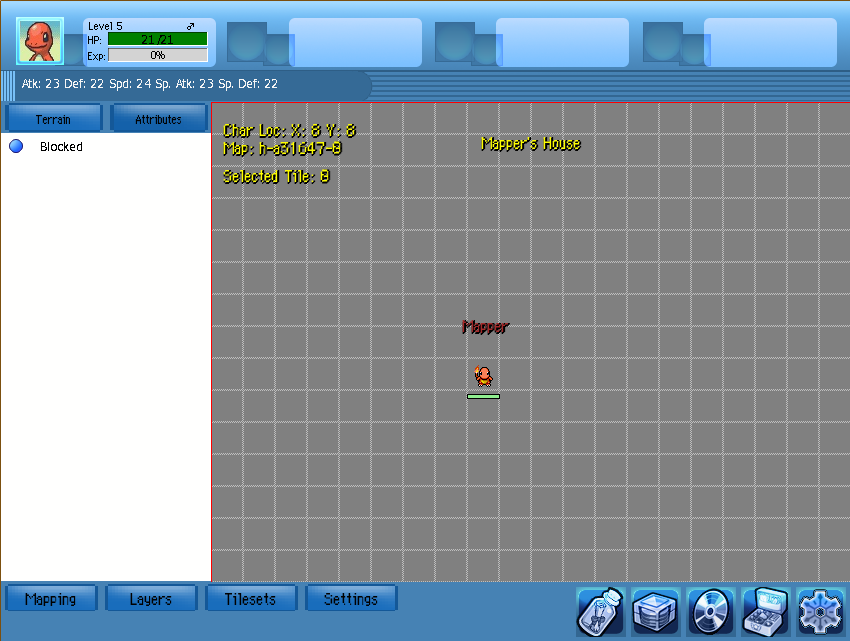
The area on the left is the attributes portion of the map editor in game. The only attributes available in game are blocks. To use them, just click on the tiles on your map you wish to block; if done correctly a capital B should appear on the tile. As the name hints, any tile where the block is added, that tile is then barred for players to pass.
c. Music
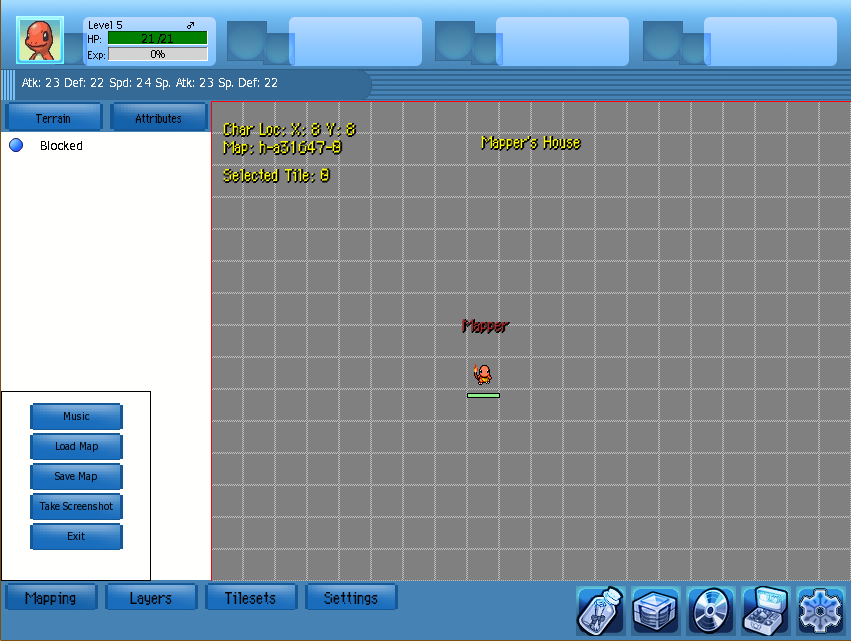
To open the music selection, scroll over the “Mapping” button in the bottom left corner, then click the button labeled “Music” at the top of that bar to make the selection window pop up.
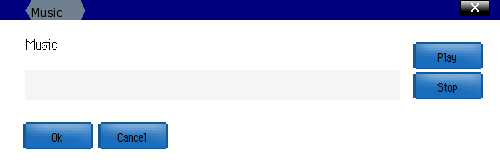
Music is an often forgotten part of a house, but I believe it adds that extra bit of flare to it, bringing the theme and house together. There are many different songs to choose from, so it should not be too much of a problem selecting a song that fits your house.
d. Save House
If you would like to save the house you are working on, click the “Save House” button. This saves your progress, closes the map editor, and allows you to explore your house freely.
If there is a lot of lag, saving a house may take a long time. Though, its a good idea to save frequently in case something causes you to lose progress.
e. Take Screenshot
To take a screenshot of only the house, without the chat/sidebar/other accessories, click the “Take Screenshot” button under “Mapping”. You have the option to include grid lines and attributes as well, but players, including you, will not be in the screenshot. After you select which kind of screenshot you want to take, it will open your PMU files where you can then select where to save your screenshot. I would suggest going into you screenshots and giving it a separate name. You can then move it from there later.
Another way to take screenshots is F11. This will take a screenshot of the whole client (chat, sidebar, etc.) as you see it. And it does include the players in it. This does not work while the map editor is open though.
To access these screenshots open “My Computer” then follow these directions:
The Folder is in C: -> Program Files -> Pokemon Mystery Universe -> Client -> Screenshots
If you want to show the screenshot to other people you can just upload to an image hosting site, and post the direct URL.
f. Exit
To exit the Map Editor you can click the button “Exit” under mapping. This will delete all the progress you have made since opening the Map Editor. So, if you have nothing to save, or wish to delete what you have been working on, the exit button is your friend.