Name’s Vincent, hehe this is my first post in this forum. I made a script for AutoHotkey for the game.
It’s quite useful because it allows playing with less keys, so users with Xpadder and controllers can find it useful.
Note: Xpadder is an application that emulates the keyboard by getting gamepad input, it’s paid software, but there are free alternatives online,
So, in order to use the utility, It’s important to first have installed the application AutoHotkey
After having installed the application, now the PMUtool.ahk file can be easily installed by opening the file through the application.
How it works?
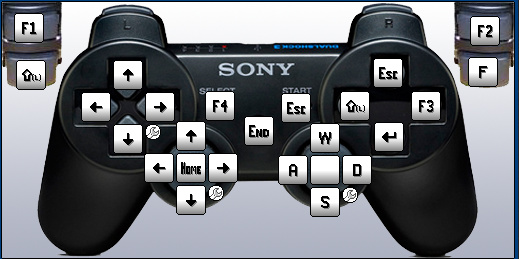
The script only affects the game if it’s the active window. The custom keys are:
F1 - Enables/Disables the utility, making the game work by default. Tab - It changes the move to be used, they are used with F. Left Alt - It locks and unlocks aiming. AltGr - This key changes the held item to be used from the members. Q - It changes the pokemon, by rotating the members clockwise. Spacebar - It uses the selected item from AltGr.
Recommendations:
It’s recommended to take into consideration that the application doesn’t prevent the usual keys from working, therefore using WASD, 1234, or ZXCV won’t deal issues.
So, this is the file and I’m glad to be able to contribute here.
So, I have been playing with Gamepad and had to make some fixes to the script, because the idea is to make it comfortable in the play experience, this is the new script,
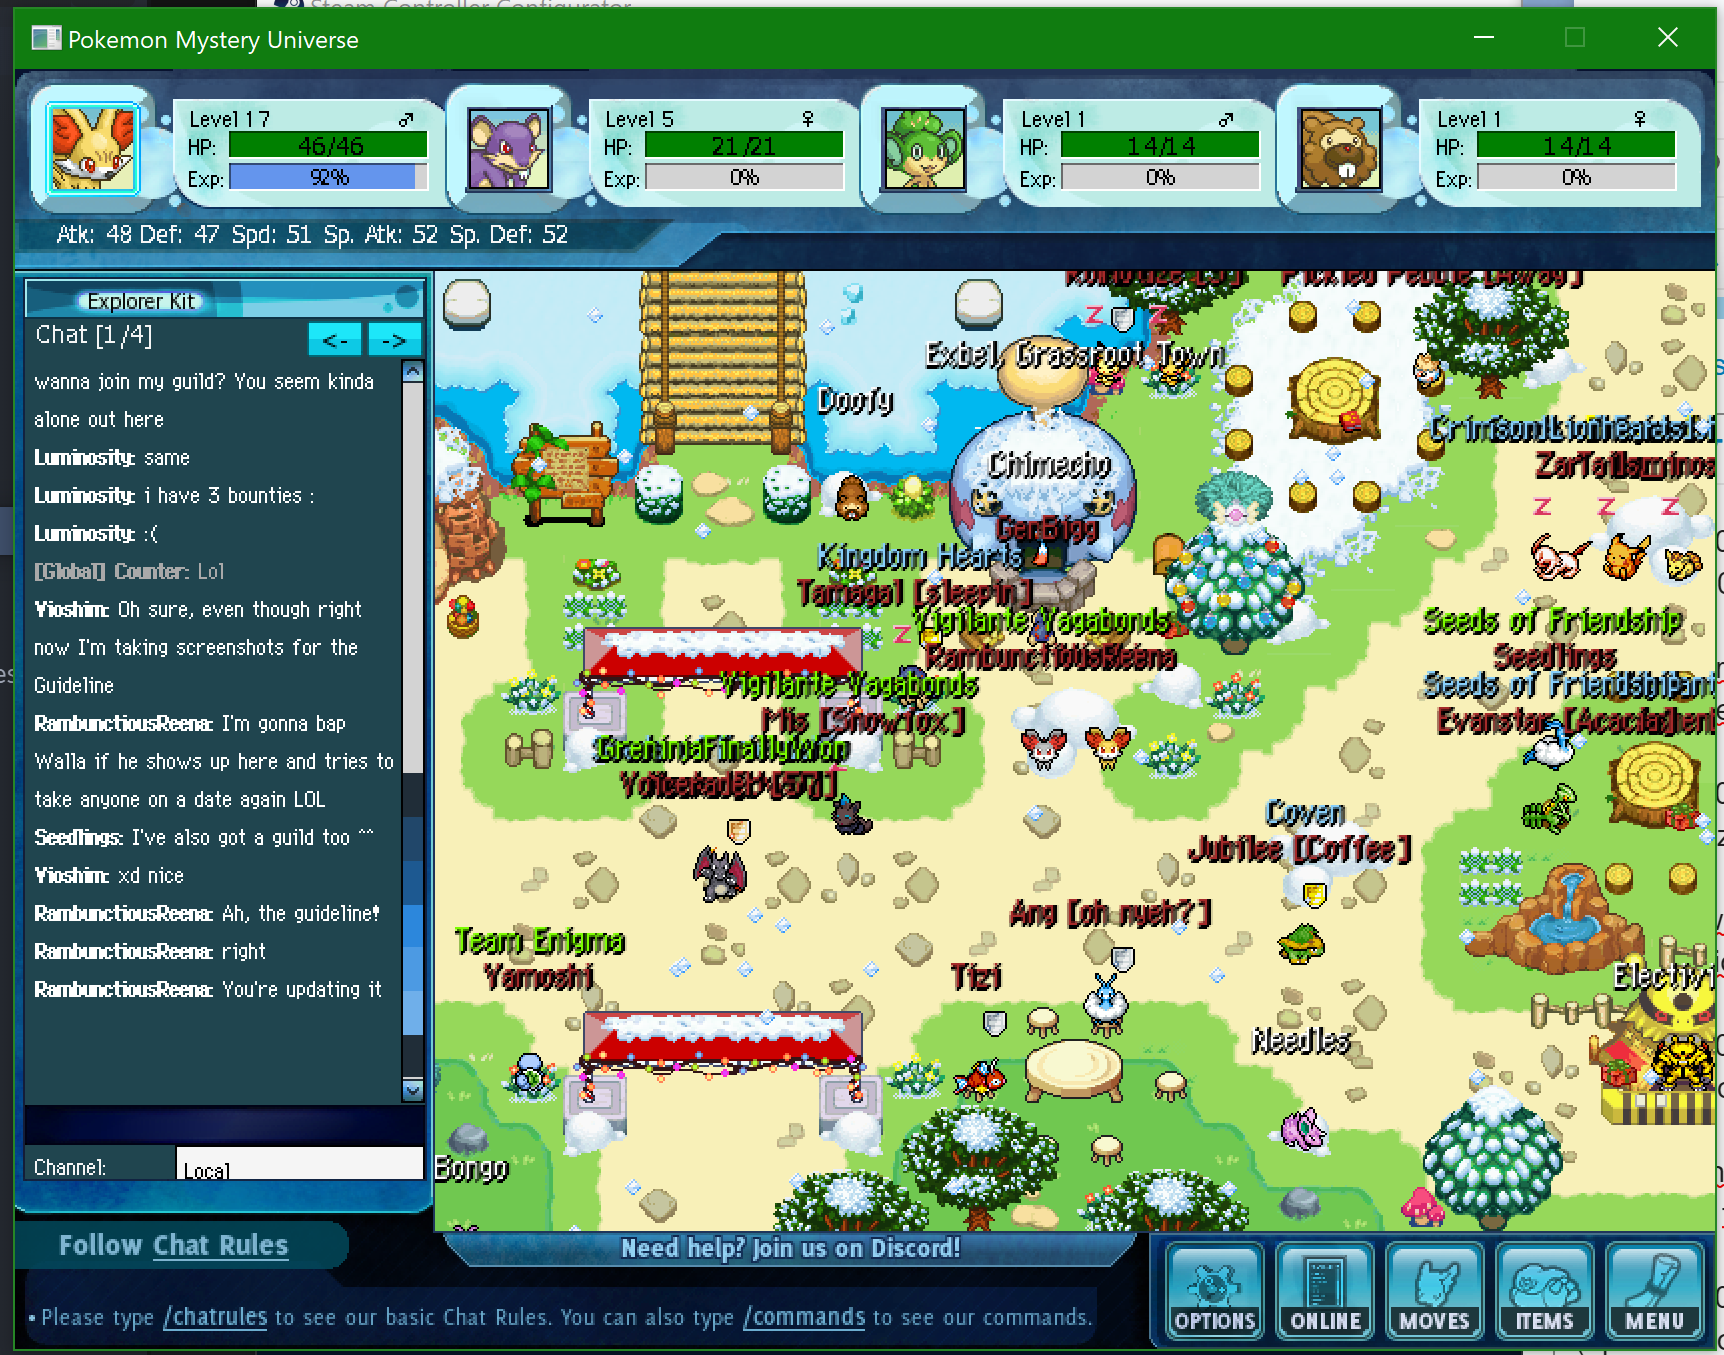
It’s been a year after I did this guide for people interested on using Gamepad with the game.
However, I’ve decided to make an easier guide that can help users to use their gamepads without issue, but this time instead of using Xpadder, we can simply use Steam
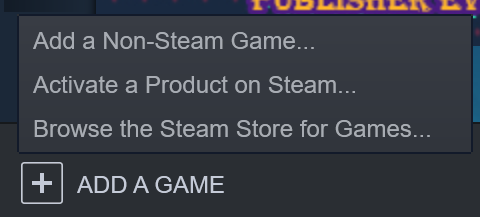
In Steam, we go to the buttom left corner, in order to Add a game, (which is a Non-Steam game of course)
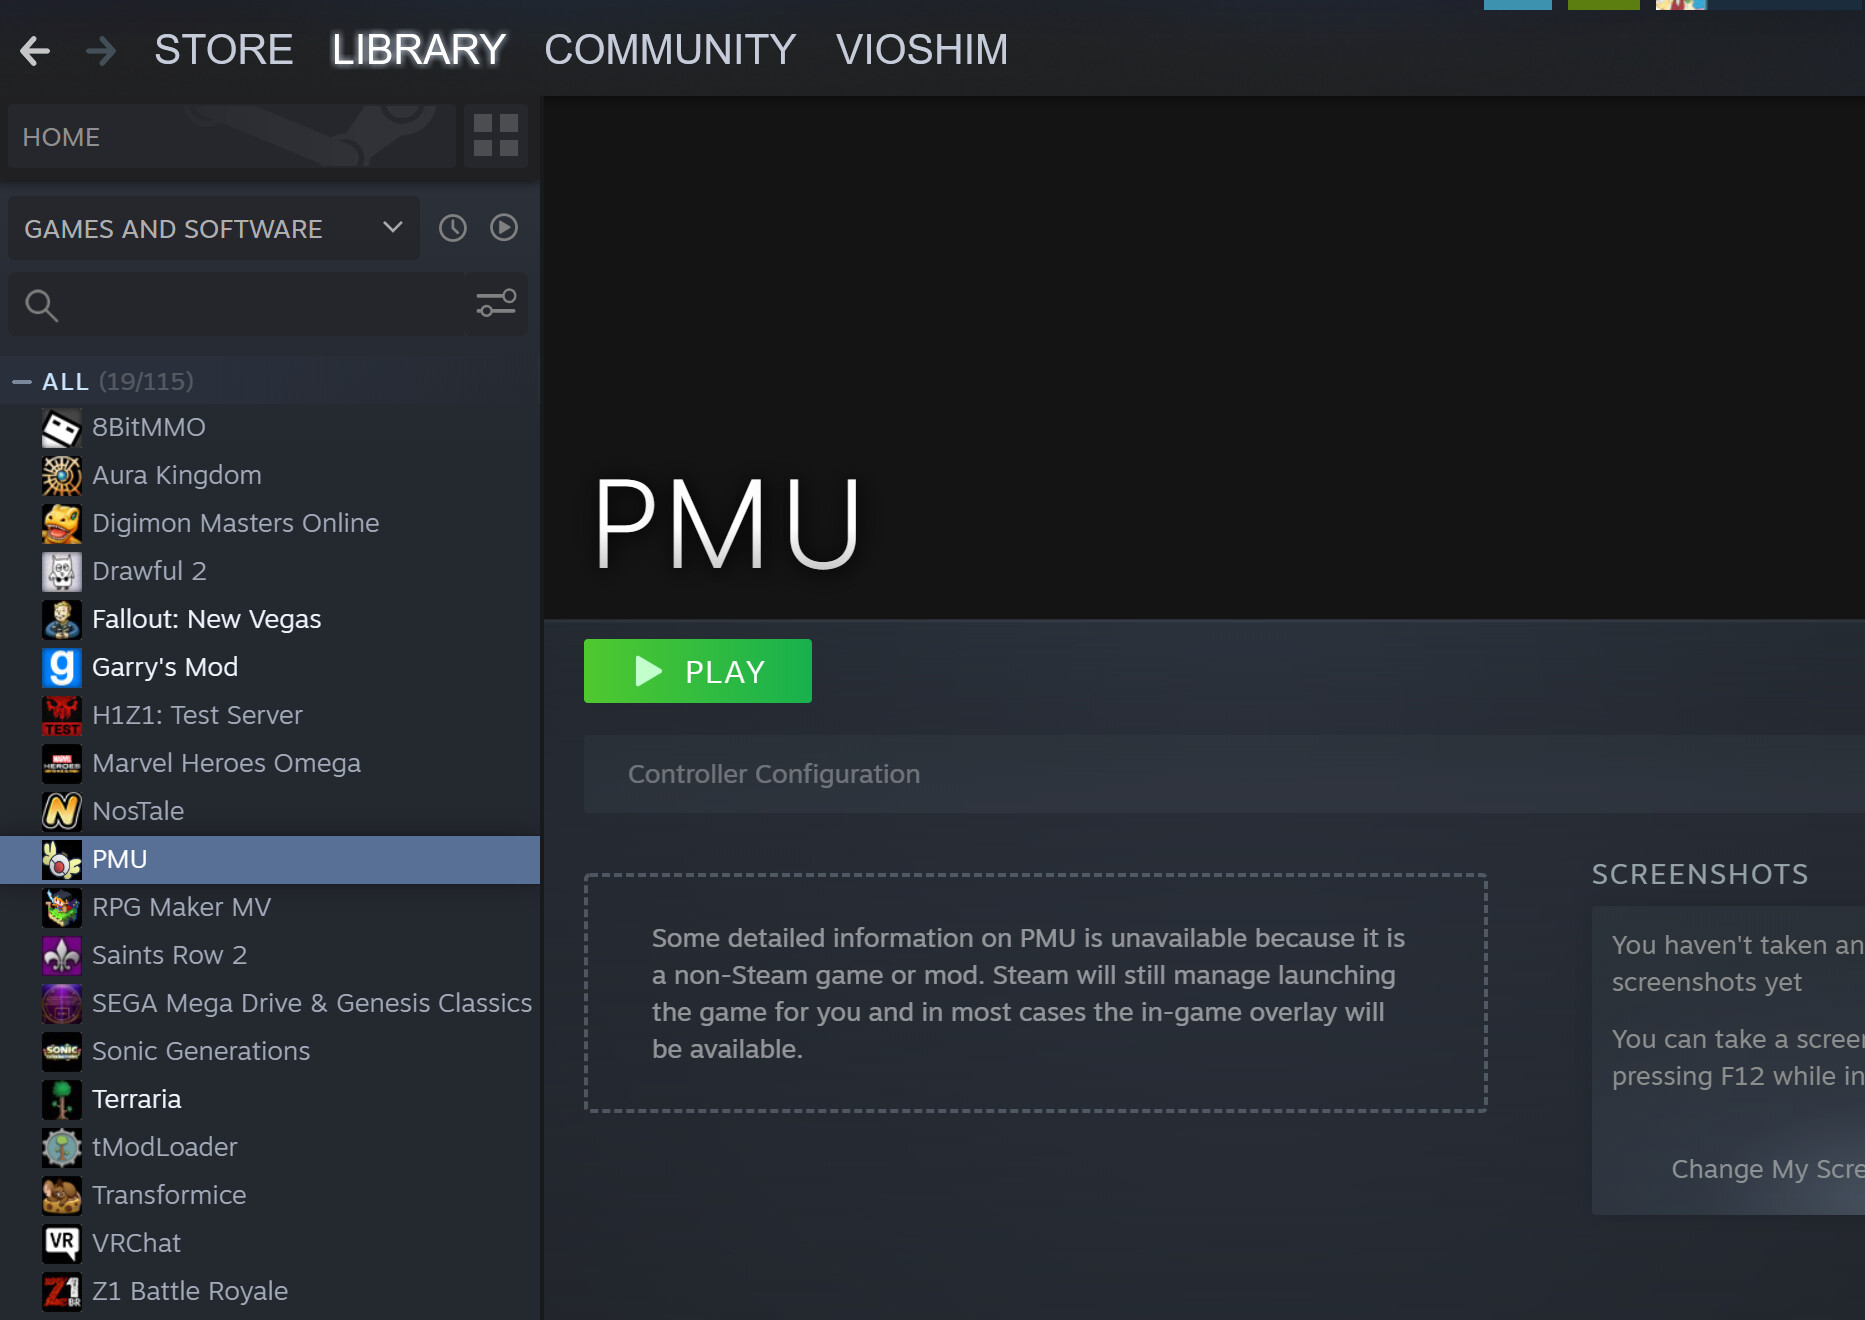
Then, we would proceed to select PMU in the list, if it doesn’t show there, we can simply use Browse… and select the PMU game
Actually amazing, got it to work in minutes. So simple & easy through Steam. Thank you for sharing this, definitely gonna start playing the game this way. Just a nice way to sit back and relax. Only thing that so far has troubled me is having enough buttons to utilize the hotkey item but I rarely use that so who really cares. Thanks again for sharing.
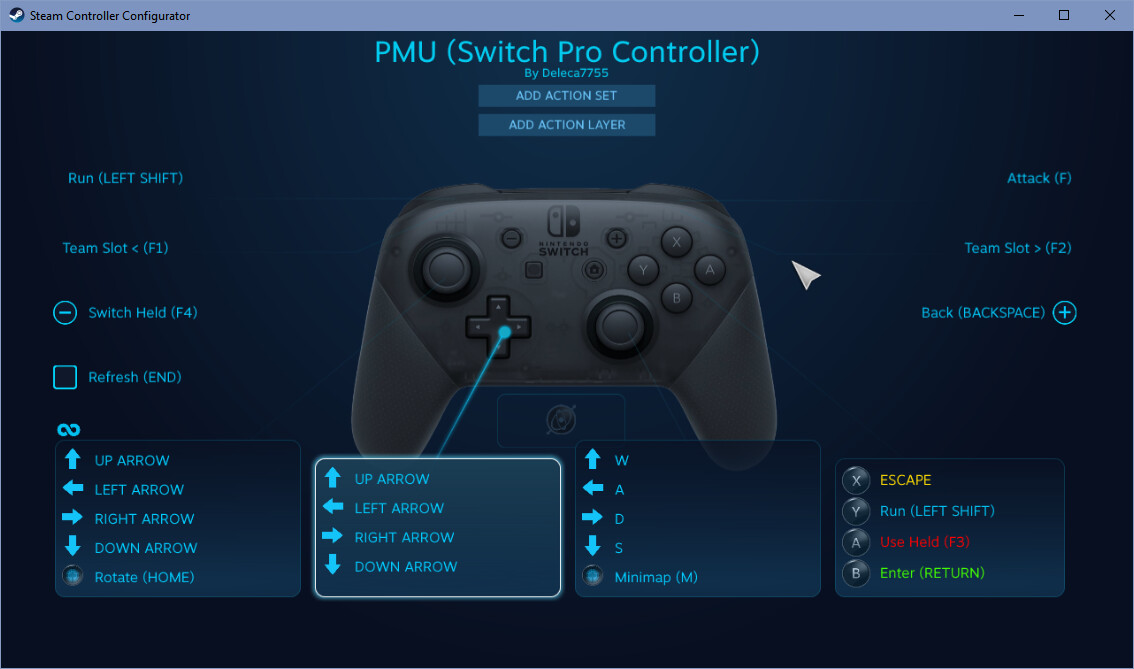
For those with a Nintendo Switch Pro Controller, I’ve exported my config for It, for both desktop and PMU as a non-Steam game for quick setup. It should be mapped relative to Tails’ Playstation controller. However, I changed the Start button Esc to Backspace In order to go backwards In menus such as storage since there was already a button for Esc, and clicking the right analog stick enables or disables the minimap.
Paste the link of the config you want to use In your browser, and It should ask to open In Steam. Top for desktop config, bottom for PMU config.
steam://controllerconfig/413080/2631120154
steam://controllerconfig/pokemon%20mystery%20universe/2631120388
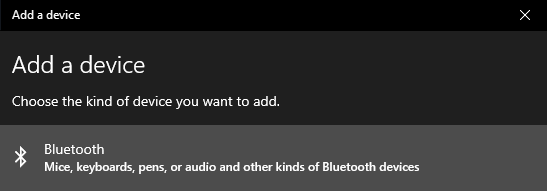
If you don’t have a cord which plugs your controller Into your laptop, Pro Controllers also work via Bluetooth. If you need to do that, here’s how:
On the top of the controller next to the cable port, you will see a tiny circluar button. Holding that should make the lights at the bottom flash back and forth. While It’s like that, you can go to Windows’ Bluetooth settings ( use the Windows search or If It’s not disabled, the Bluetooth Icon In the system tray ).
Click this:
Your controller should show up under this when trying to sync:
Once you pair your controller, you should be able to connect It to your laptop as long as Steam Is open. Simply pressing a button will trigger the connection. It can/will go to sleep after some time which Is configurable In Steam’s general controller settings. If you reconnect your controller to your Switch, you will have to go through the syncing process again for your computer In order to connect It there again.
Adding this here for any future troubleshooting purposes.
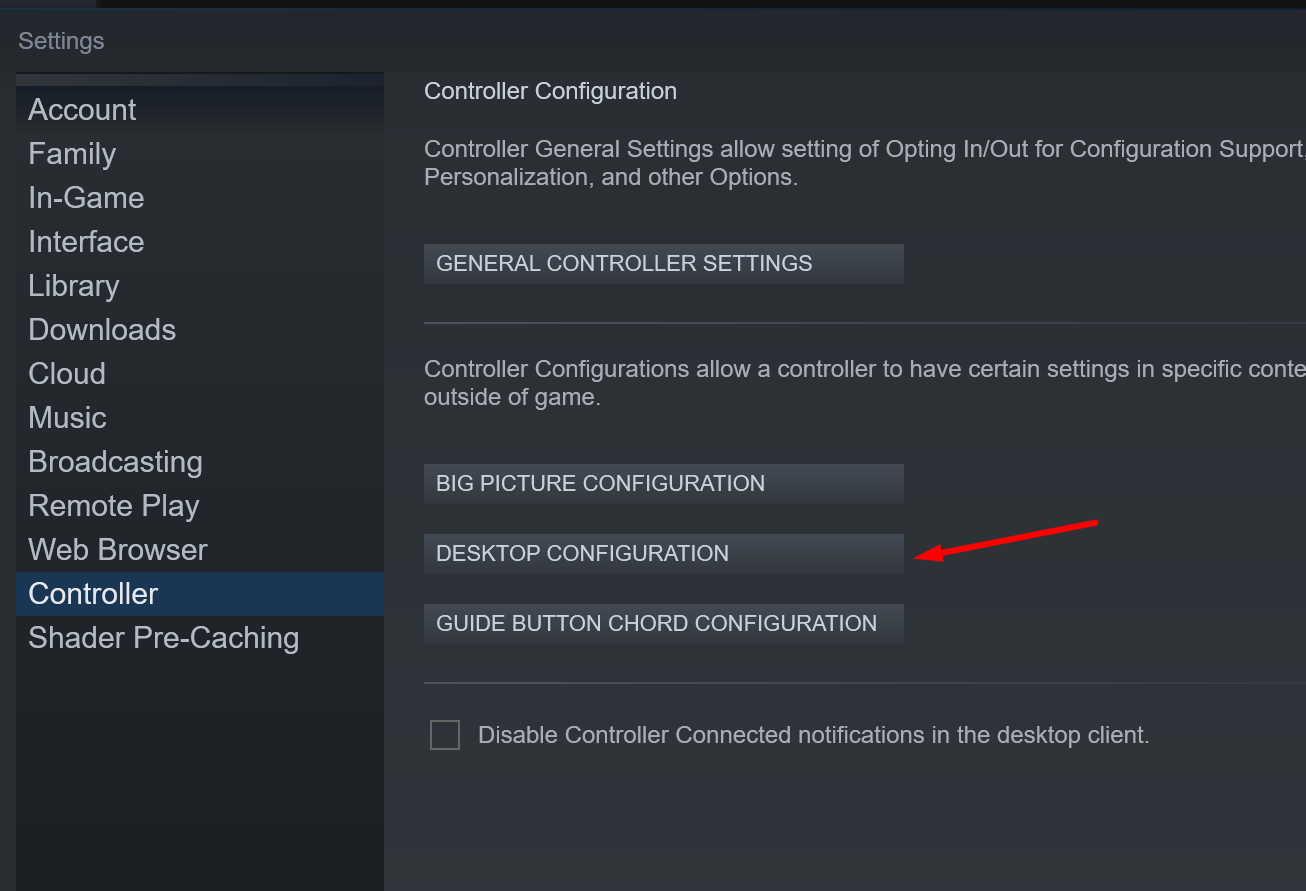
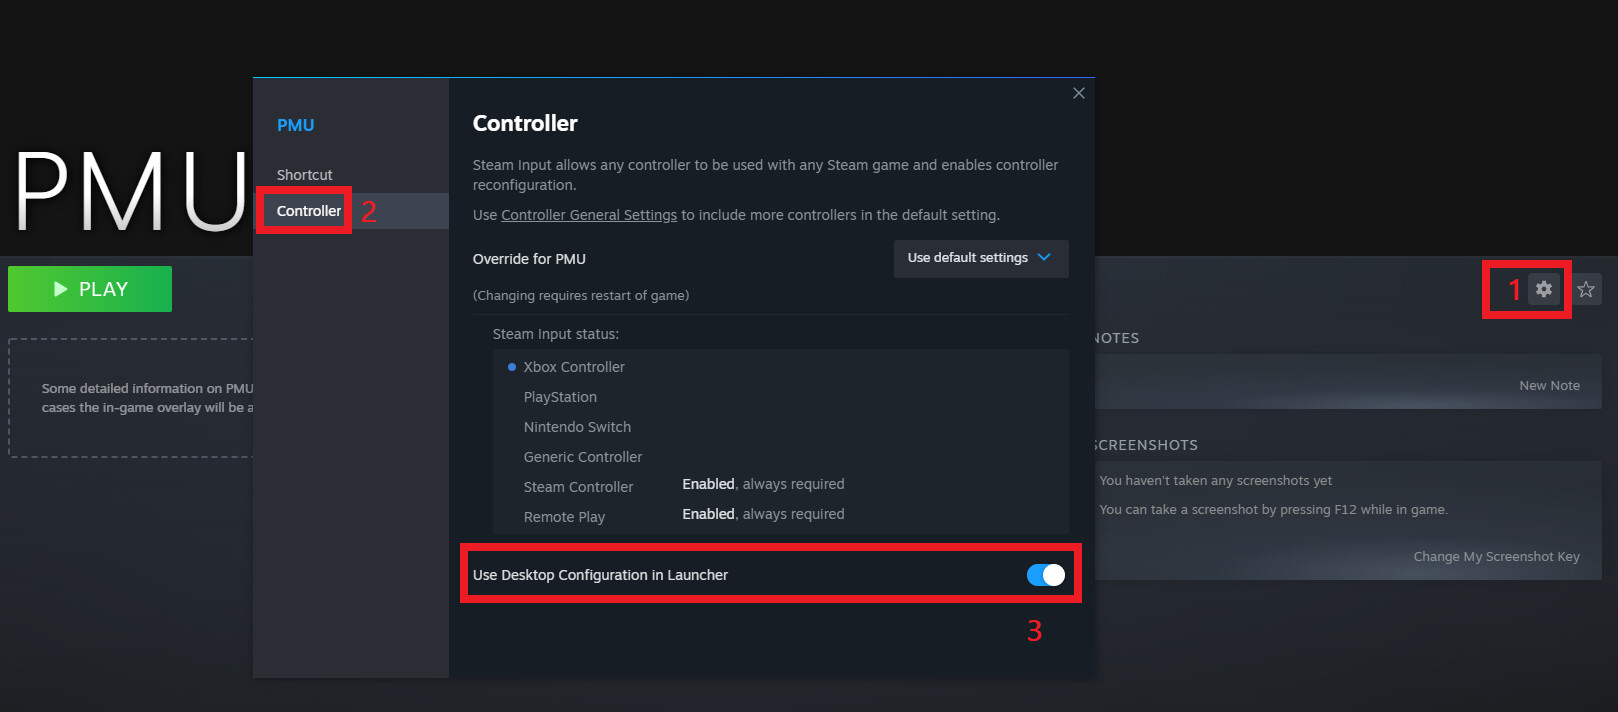
If your controller does not work or you’re having trouble switching to your custom controller profile for PMU, try launching PMU with the steam setting:
Use Desktop Configuration Enabled
OR
Use Desktop Configuration Disabled
You can find this setting on PMU in Steam Library → “Gear Icon” → Properties → Controller Tab